Firebase Setup in Android Studio
What is Google FireBase?
Firebase is a platform to build an application with high quality and in efficient way. It saves lot of time to create backend process. With the help of Firebase we can manage our product in all platforms like Web application, Android and IOS etc. Firebase gives so many useful services like
-
- Real time database
- Push notification
- Firebase Analytics
- Firebase Authentication
- Firebase Cloud Messaging
- Firebase Storage
Firebase Setup in Android Studio
- Create an Android studio project “MyFirebase”
- Add your gmail account in android studio.(Top right corner in android studio).
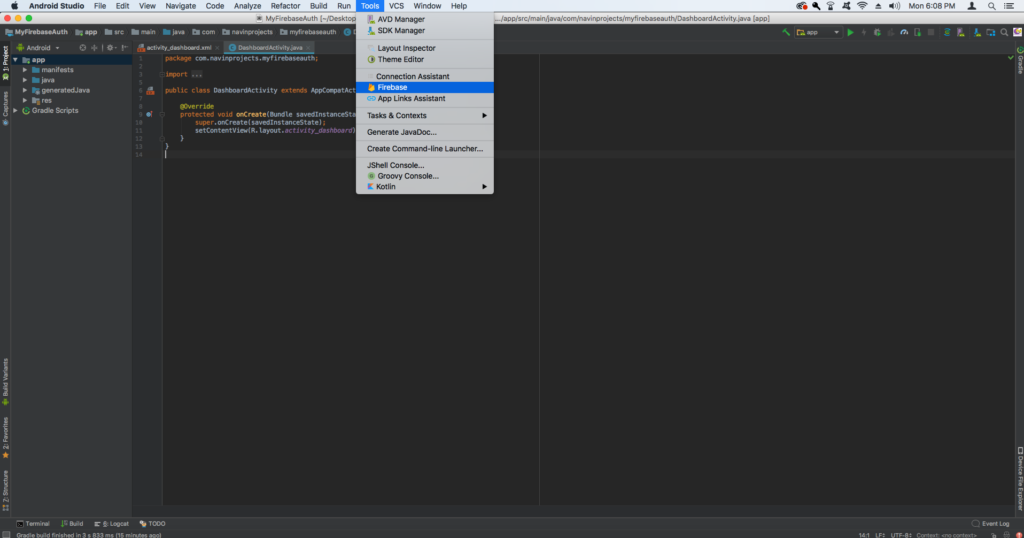
- After adding your account, Go to Tools and select Firebase.(This may vary in future)
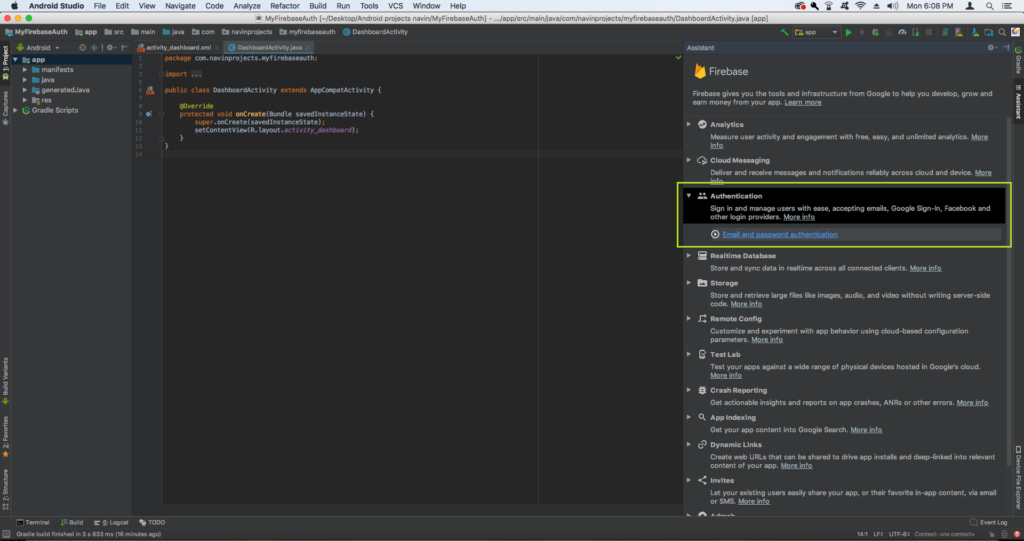
- Now select Authentication on the rightside
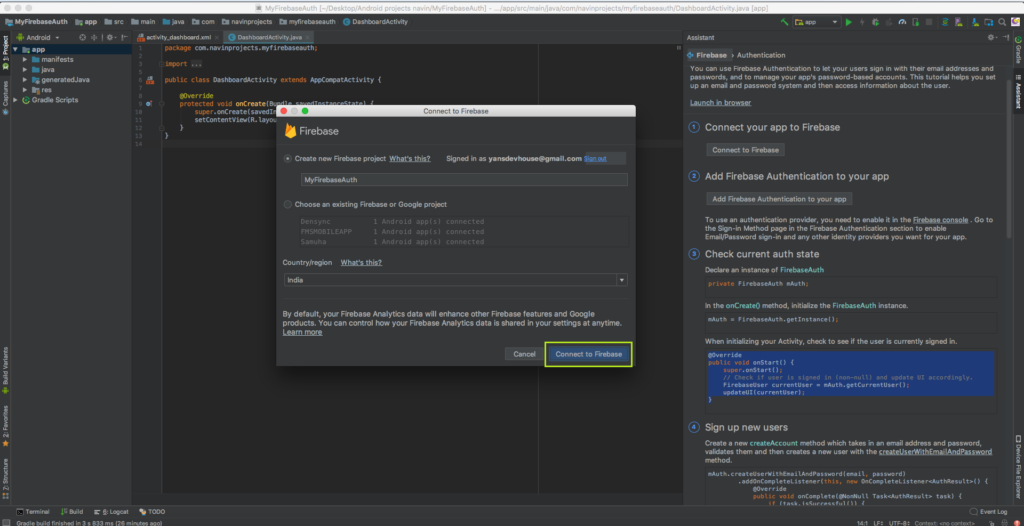
- Now click Connect to firebase on authentication.
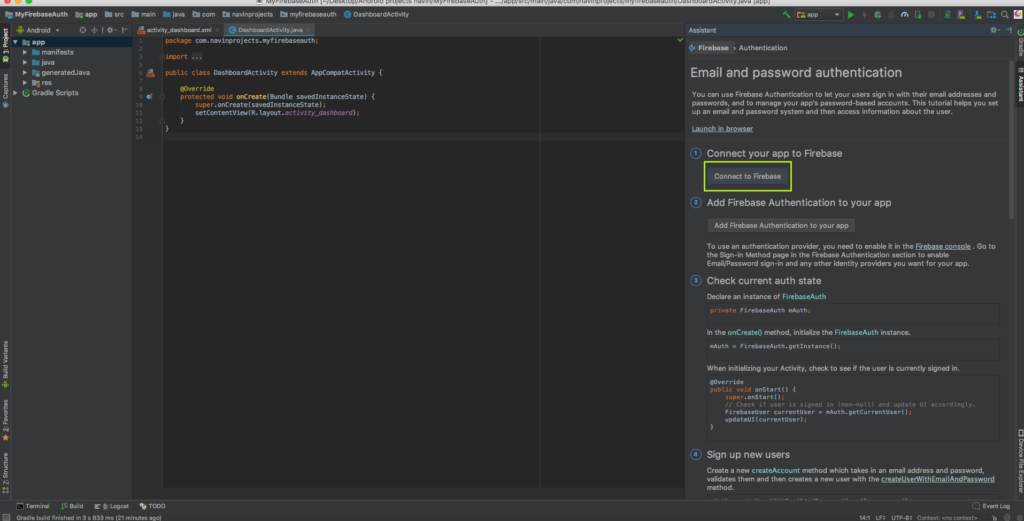
- Now click Connect to firebase on popup tab, then firebase is successfully connected.
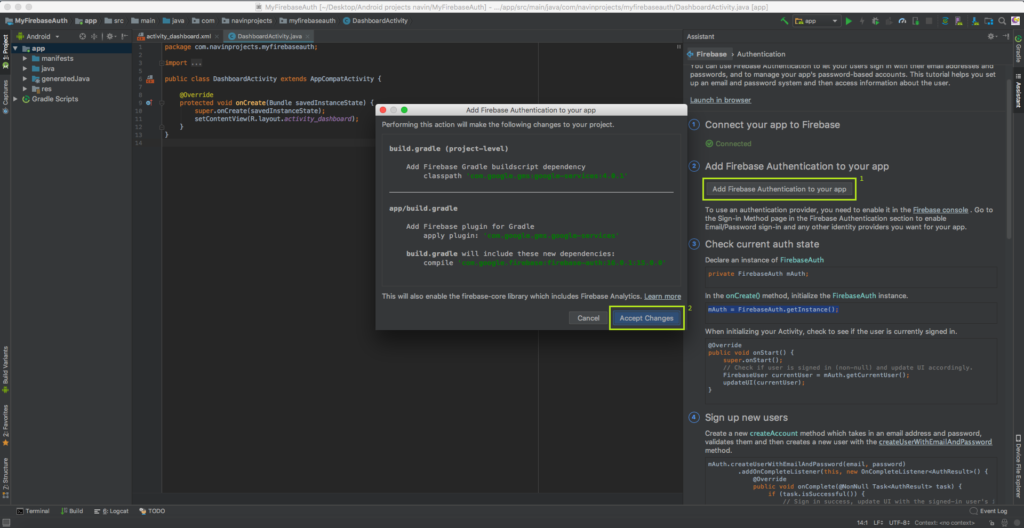
- Now click Add Firebase Authentication to your app, then select Accept Changes on pop up tab.
If !Error occurs: Failed to resolve: firebase-auth-15.0.0.
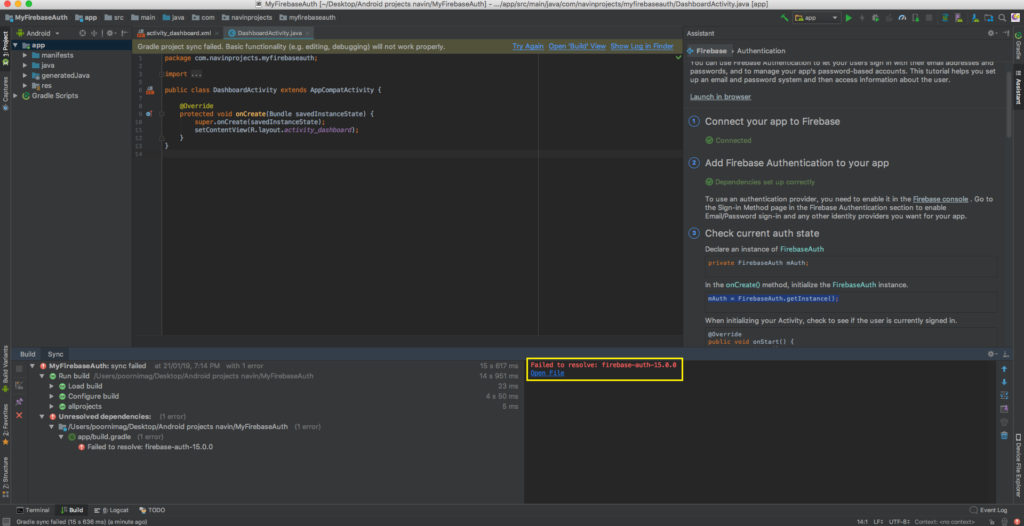
To resolve, Goto build.gradle (module app) file. remove :15.0.0 on the below code.
implementation 'com.google.firebase:firebase-auth:16.0.1:15.0.0'
Add the below codeimplementation 'com.google.firebase:firebase-auth:16.0.1'
Now gradle will successfully build
Now Firebase setup for authentication is completed, we can also add Firebase Cloud Messaging, Analytics, Realtime DB same as above steps.
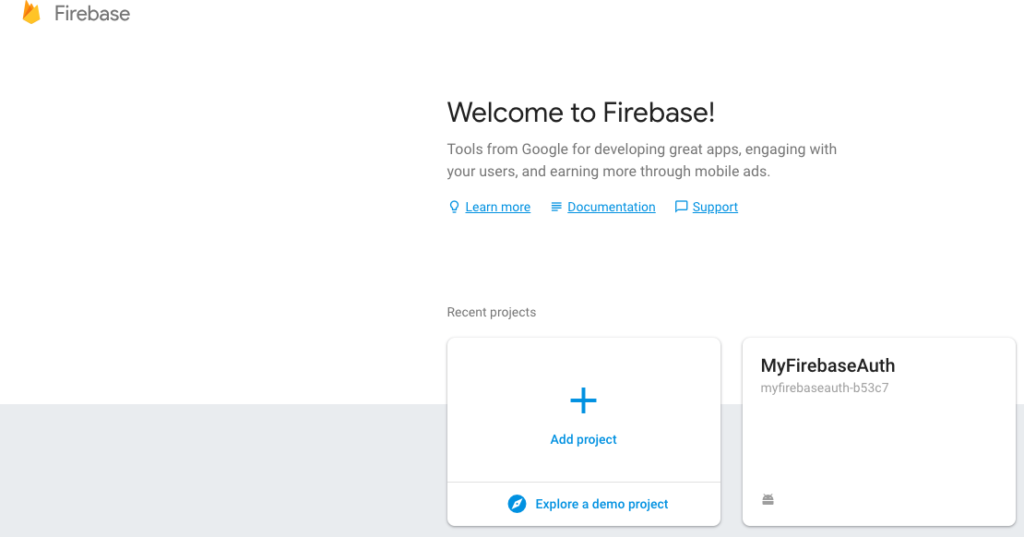
Now go to Firebase console https://console.firebase.google.com/ .Your project has been created.
I am NavinKumar, Android and Flutter developer. You can find me on Linkedin or stalk me on GitHub or Follow me on Medium.


